
Appearance
Exercise 3 - Explore Identity Resolution
Once data has been ingested into the Data Cloud, we need to unify the data. In this step, we review the configuration since the unification was executed before the workshop.
Step 1: Unify Profiles with Identity Resolution
While still in Data Cloud, click the Identity Resolutions tab. You may need to change the List View filter to All Identity Resolutions. Like the Data Streams tab, this shows a list of Ruleset Names along with their attributes and results, including the number and percentage of matching records.
Click the first ruleset, Unified Guests, to see more details.

Under the Ruleset Properties tab, review the two primary parts of the ruleset:
Match Rules: These define the attributes used to identify matching records. In this example, we use a Fuzzy match for the Name and a “normalized” match for the email.
Reconciliation Rules: Matched data sources may provide different values for a single field. Reconciliation rules specify the best value to save to the unified profile. Options include Most Frequent or Source Priority.
Step 2: Query the Individual & Unified Individual DMOs using Data Explorer
With customer unification complete, we can use Data Explorer to review the “Before” and “After” results.
While still in Data Cloud, click the Data Explorer tab.
Keep the default Data Space selected.
In the Object dropdown, select Data Model Object.
In the Select an Object search field, select the Individual object.
Click the Edit Columns buttons.
Select the Individual Id, First Name, Last Name, Data Source, and Birth Date columns, and click Done.

Click the Filter icon (upper right corner of the screen).
Click Add Filter.
Configure the filter with the following values:
| Filter Field | Value |
|---|---|
| Field | Last Name |
| Operator | equals |
| Value | Rodriguez |
- Click Done
- Click Apply

You should see multiple records for Sofia Rodriguez. This Individual DMO represents the cross-reference or contributing records. Next, we’ll query the Unified Individual to see the unified profile for Sofia.
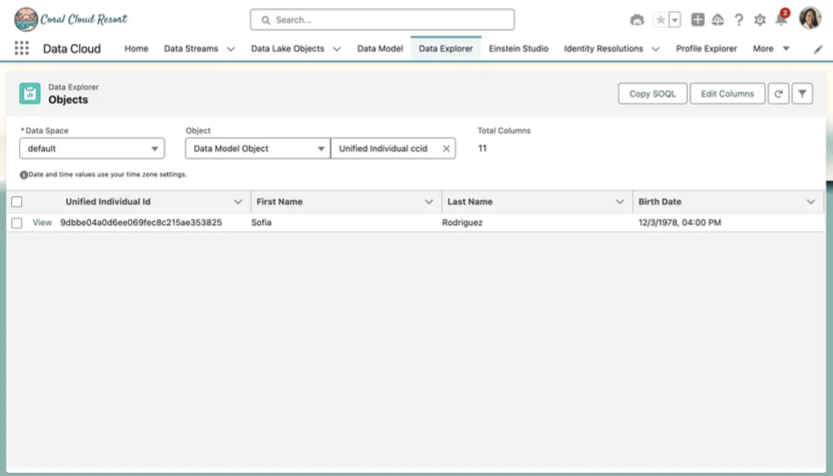
- Back at the top of the Data Explorer, clear the Individual from the Object Selection. Leave the Object set to Data Model Object.
- Select Unified Individual.
- Again, the filter for Last Name equals Rodriguez.
- You should now see a single record representing the consolidated profile.
This completes Exercise 3.