
Appearance
Exercise 5 - Segmentation
Learn how to use Segmentation in Data Cloud to build targeted audiences to understand, target, and analyze your customers. You can create segments on any entities from your data model and then refresh and publish them on a chosen schedule or as needed.
Coral Cloud wants to re-engage past visitors since they have remodeled their KIDS Camp. They want to create a segment of past guests who visited their resort a year ago and more than two children.
Step 1: Segmentation Leveraging Generative AI to Build a Segment
Locate and click the Segments tab (note: it may be under More). Click the New button.
Let’s start with Einstein. Select Create with Einstein, select Unified Individual for Segment On, and click Next.

If you see “You’re About to use Einstein” click the Got It button and close any other Gen AI warnings.
Describe your segment: “Guests who checked in within the past 6 months and have more than two children” Click the arrowhead button to the right of the prompt to submit it to Einstein.

- From here, we have several choices:
- We can rename the Segment in the top left.
- Click Count Population to measure the current segment size.
- We can unselect attributes that we don’t want to use. In this example, unselect Created Date under Unified Individual. We want to use the Check-in Date.
- Refresh the Population Count to see the smaller segment size. Confirm that the segment count is smaller than the total population, around 25%. If not, repeat steps c and d.
- In the Einstein conversation, we can “Refine Segment” to continue the conversation with Einstein by editing our prompt in the lower right.
- Click the Edit Segment Rules button to edit the segment rules in Segment Builder.

Step 2: Manually Refine the Segment Using the Visual Segment Builder
In the main part of the Builder, you can see the current segment count – if your count doesn’t match the facilitator or your neighbor, it’s ok.
Below that is the Include tab showing the rules that Einstein generated. You can edit and add to these rules.
From Segment Builder’s left palette, you can access Direct (Unified Individual) attributes, Calculated Insights, and Related Attributes and reuse other segments to further define the segment that Einstein initially created.
Expand Direct Attributes and click Unified Individual. Below the Individual attributes, you should find the Calculated Insights.

Let’s include guests who have recently visited the website since the beginning of the year. In the left palette, expand Related Attributes to see objects related to the Guest, like email and website engagement, reservations, contact points, and the cases added in the previous exercise.
Expand Website Engagement. Drag and drop the Engagement Date Time onto the Include Tab.
Set the Measurement to Count At Least 1 with the Engagement Date Time is This Year. Click Done and recount the segment.

Next to Include, click the Exclude tab.
Let’s use the Case data to exclude guests with Open Cases.
Under Related Attributes, expand the Case.
Drag and drop the Case Status attribute to the Exclude tab.
For Measurement, select Count At Least 1; for Case Status, select the operator Is Not Equal To from the drop=down menu. Enter Closed into the value field and click on Closed when it appears in the drop-down.
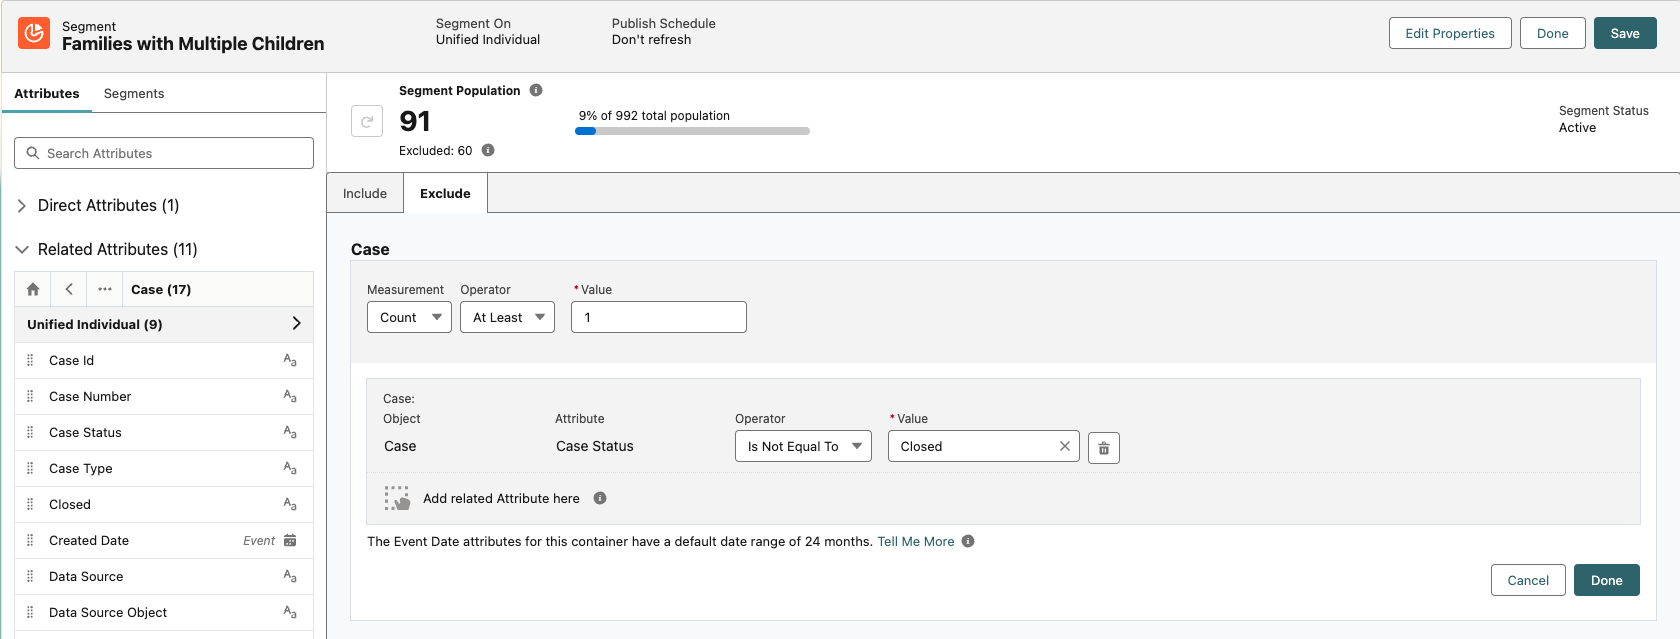
Click Done and recount the Segment.
Notice the change to the Segment Population. Click Done to close the Segment Builder.
From the Segment detail page, click the arrowhead on the top right and select Publish Now

The Publish Status should change from Publishing to Success within a few minutes.
This completes Exercise 5.